Deploy Static Web App
If you’ve been following along with the guided tour, you know everything up to now has just been pillow talk. Well, it’s time to get down and dirty as we use Terraform to deploy a resource. And that resource will be an empty Azure Static Web App!
Empty? Yep. We asked our web designer to create a site and they’re still working on it, so we don’t actually have the web content yet. However, we can go ahead and deploy the web infrastructure so that we can just plop the web content on there when it’s ready.
Prerequisites
To do this procedure, you’ll need to have already performed the following items.
Configure Authentication
Before proceeding, read about how we’re not using Terraform Cloud right now. This is an important thing to know because we’re doing things a little differently for this deployment than we will be doing in future posts which is why logging in through the Azure CLI is necessary.
We’re going to create a service principal in Azure that will be used by Terraform to gain access to Azure in order to deploy our Static Web App resource. This will just be a rehash of the Authenticate using the Azure CLI step of the Terraform Tutorial that you may have already performed, so I’ll provide links to that tutorial with some additional commentary.
If you’ve already created the service principal and remember your client secret, you only need to do the last step to set your environment variables.
- First, follow the steps to log into Azure and set your subscription in the Authenticate using the Azure CLI step.
- Next, create a service principal. If you’ve already done that and saved the password in a secure location, you can skip this. If you don’t know the password, you can create a new service principal (you may want to delete the old one for housekeeping purposes, if no one is using it). If you don’t remember the app ID, you can find it in the Azure portal by searching for and selecting App registrations. You may need to select the All application tab if you don’t see it listed.
- Finally, set your environment variables.
Terraform
Time to define our Static Web App resource using Terraform. Let’s get to it!
In our last post we created new repositories in GitHub and cloned them to our local computer. The folder structure should look like this on your computer.
-
 $HOME
$HOME -
Projects
-
scramoose-infrastructure
-
scramoose-web-public
We’ll be working in the scramoose-infrastructure repository for this post. This will be the first resource we manage with Terraform, so let’s create a new working directory for this. First, let’s create a new folder for all our Terraform configurations called, well, terraform. Below that, let’s create the working directory called public-web-site-swa.
-
$HOME
-
Projects
-
scramoose-infrastructure
-
terraform
-
public-web-site-swa
Check the scramoose-infrastructure repository for inspiration on how to structure your IaC files. There’s no right way, and my instructions above are merely a suggestion.
Just in case you were afraid to ask, you can create new files and folders in VS Code by right-clicking on a parent folder in the Explorer ![]() view and selecting New File or New Folder.
view and selecting New File or New Folder.
Terraform Settings
Let’s create our first Terraform file. We’ll call this file base.tf and it will contain the settings for our Terraform configuration. Create a new file in VS Code named base.tf in the terraform/public-web-site-swa folder and add the following code.
1
2
3
4
5
6
7
8
9
10
11
12
13
14

terraform {
  required_providers {
    azurerm = {
      source  = "hashicorp/azurerm"
      version = "~> 3.95"
    }
  }

  required_version = ">= 0.12"
}

provider "azurerm" {
  features {}
}
Great job! You’ve written a Terraform file that tells Terraform the following:
- Line 9: We require at least version 0.12 of Terraform.
- Lines 2-7: We will be using the azurerm provider and want version 3.9.x.
- Lines 12-14: The azurerm provider needs to be configured. In this case, we’re fine with all the defaults, but the
featuresblock is required nonetheless, so that’s why it’s an empty features block.
Now we need to initialize our Terraform working directory which will download all our providers to the .terraform folder. It will also create a dependency lock file named terraform.lock.hcl. Some providers may depend on each other and this is how Terraform keeps track of that.
Start a terminal in VS Code (View > Terminal or Ctrl+`) and cd into the terraform/public-web-site-swa folder. Type the following to initialize the working directory.
terraform init
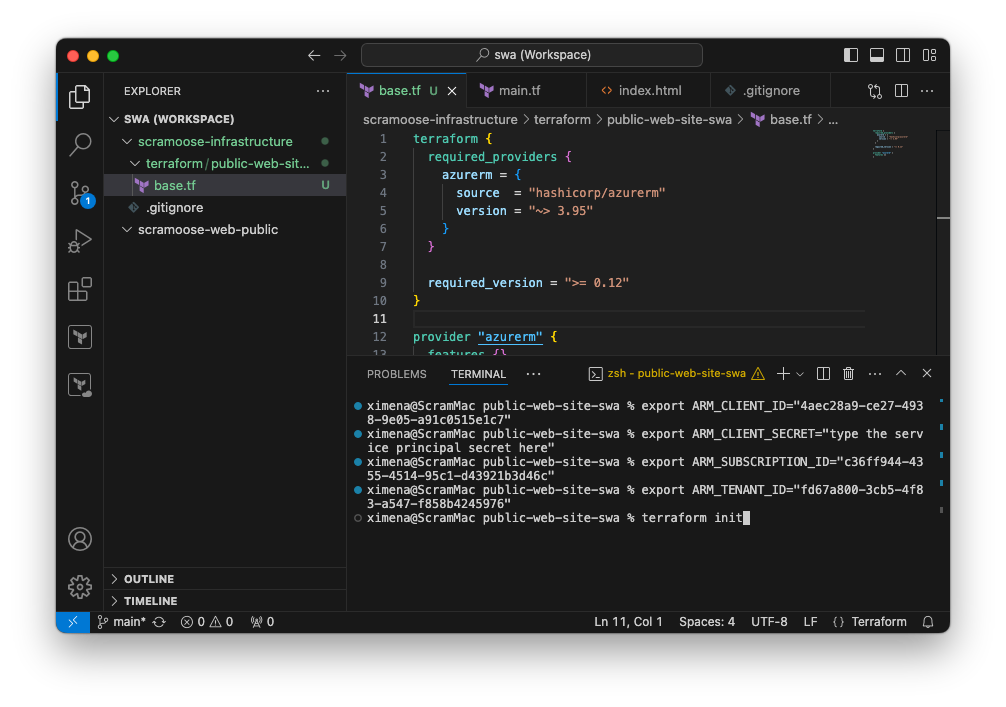
export statements are, you probably skipped step 3 in the Configure Authentication section.
You’ll see something similar to the following output.
Initializing the backend...

Initializing provider plugins...
- Finding hashicorp/azurerm versions matching "~> 3.95"...
- Installing hashicorp/azurerm v3.106.1...
- Installed hashicorp/azurerm v3.106.1 (signed by HashiCorp)

Terraform has created a lock file .terraform.lock.hcl to record the provider
selections it made above. Include this file in your version control repository
so that Terraform can guarantee to make the same selections by default when
you run "terraform init" in the future.

Terraform has been successfully initialized!

You may now begin working with Terraform. Try running "terraform plan" to see
any changes that are required for your infrastructure. All Terraform commands
should now work.

If you ever set or change modules or backend configuration for Terraform,
rerun this command to reinitialize your working directory. If you forget, other
commands will detect it and remind you to do so if necessary.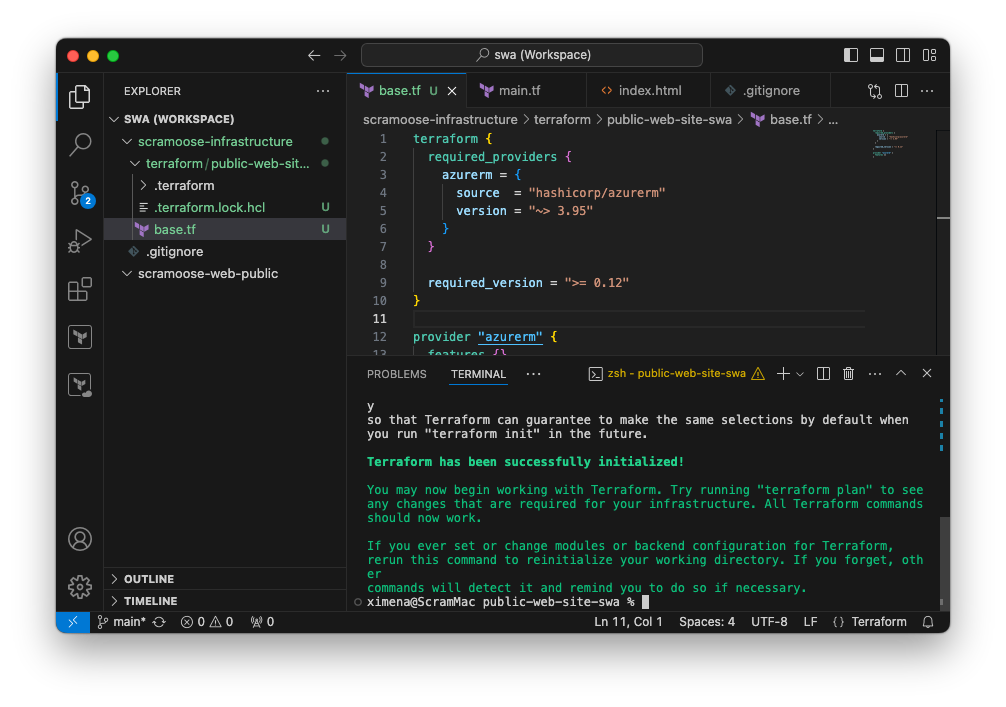
Create Resource Group
The rest of our Terraform configuration will be in separate file called main.tf. Since the Terraform configuration in base.tf isn’t all that interesting and won’t change much, it’s nice to see the real meat-n-potatoes in a single file. Create your main.tf file in your working directory.
We’ll need a resource group where the Static Web App will live, so let’s define that in our configuration. Add the following to your main.tf file.
resource "azurerm_resource_group" "public_site" {
  name = "scrm-webpub-prd-1"
  location = "East US 2"
}
Notice that we’re using our naming conventions for Azure resources.
Now run this command to make sure you pasted/typed it correctly.
terraform validate
If you see the following output, you’re all good! If not, go check your Terraform code for mistakes.
Success! The configuration is valid.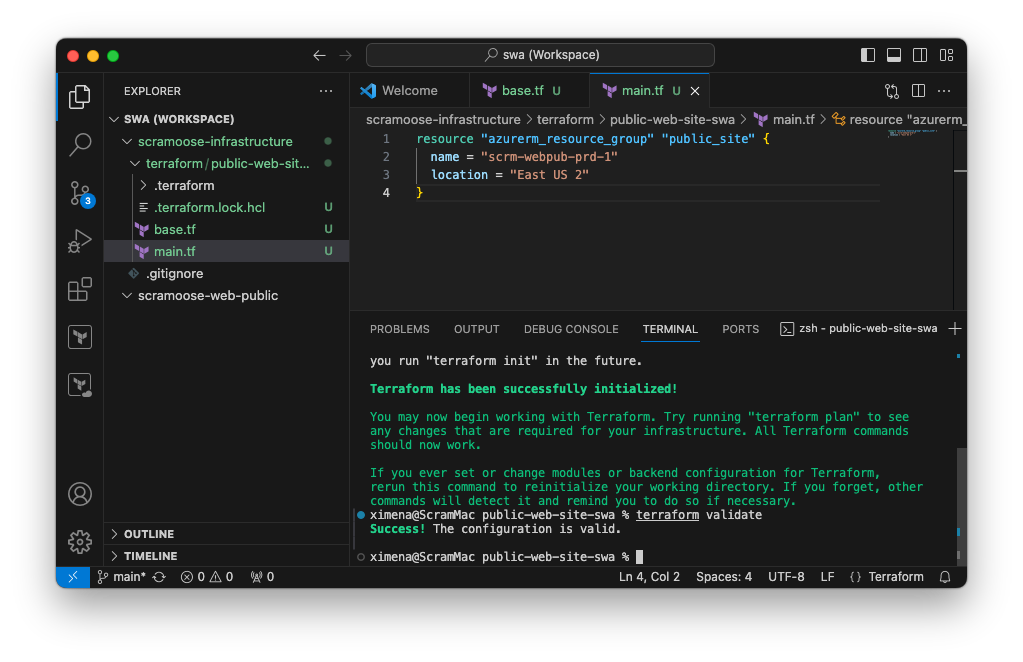
We’re almost ready to deploy the resource group. But first, let’s see what Terraform thinks would happen if we deployed this. Like a little test run.
terraform plan
You should see this output.
Terraform used the selected providers to generate the following execution plan. Resource actions are
indicated with the following symbols:
  + create

Terraform will perform the following actions:

  # azurerm_resource_group.public_site will be created
  + resource "azurerm_resource_group" "public_site" {
      + id       = (known after apply)
      + location = "eastus2"
      + name     = "scrm-webpub-prd-1"
    }

Plan: 1 to add, 0 to change, 0 to destroy.
Terraform is telling you that it plans to create one resource which wil be our resource group. We haven’t created that resource group yet, so that checks out. We’ve defined most properties manually, but the ID of our resource group won’t be known until after we create it which is why it is labeled as (known after apply).
Okay, let’s tell Terraform to create the resource group!
terraform apply
You’ll see the following output.
Terraform used the selected providers to generate the following execution plan. Resource actions are indicated with the following symbols:
+ create
Terraform will perform the following actions:
# azurerm_resource_group.public_site will be created
+ resource "azurerm_resource_group" "public_site" {
+ id = (known after apply)
+ location = "eastus2"
+ name = "scrm-webpub-prd-1"
}
Plan: 1 to add, 0 to change, 0 to destroy.
Do you want to perform these actions?
Terraform will perform the actions described above.
Only 'yes' will be accepted to approve.
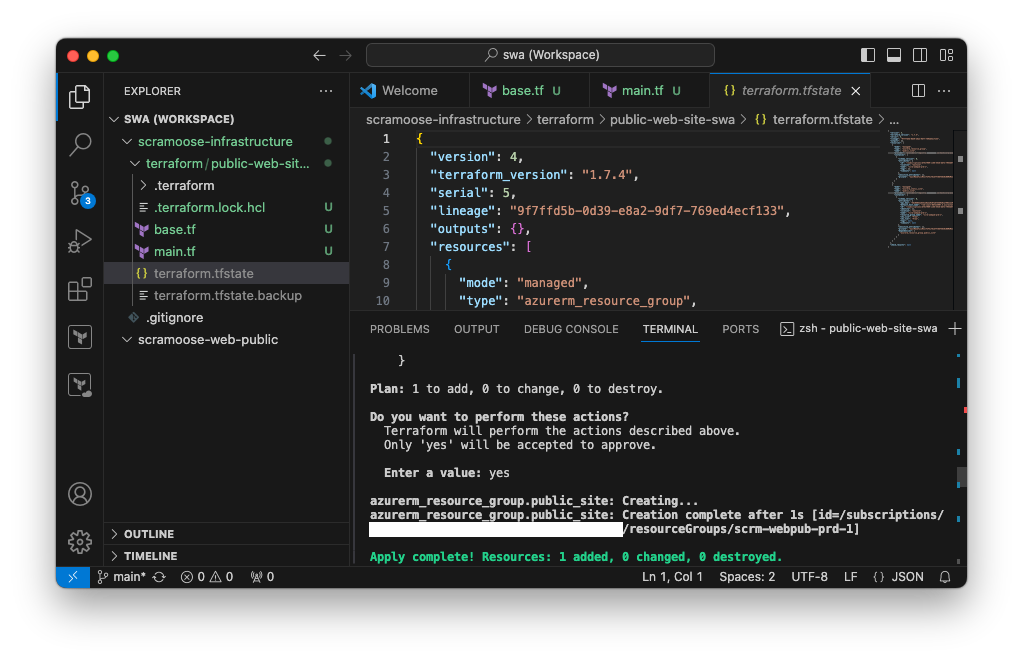
Enter a value:Terraform runs the plan one last time and then asks you if you’re double sure you want to do this. They even make you type out yes fully like a third-grader. But that’s fine because it makes you think about what you’re doing. Type y - e - s and then shakily hit the Enter key.
What have you done??!! Did you just mess up your whole Azure environment?? Don’t worry, you’re fine! Yes, just like anything in tech, you can screw up things royally but creating a resource group is one of the most harmless things you can do in Azure, so take a breath, you’re good.
  Enter a value: yes

azurerm_resource_group.public_site: Creating...
azurerm_resource_group.public_site: Creation complete after 1s [id=/subscriptions/c36ff944-4355-4514-95c1-d43921b3d46c/resourceGroups/scrm-webpub-prd-1]

Apply complete! Resources: 1 added, 0 changed, 0 destroyed.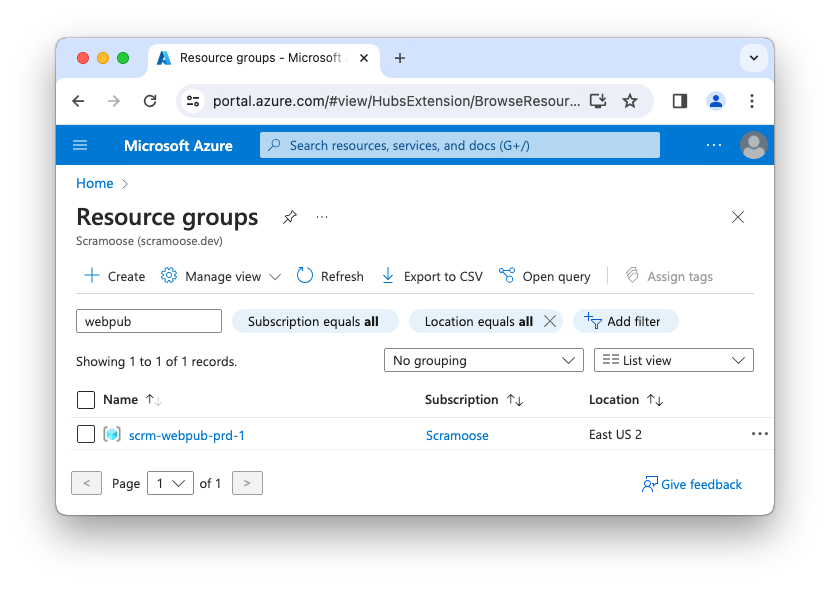
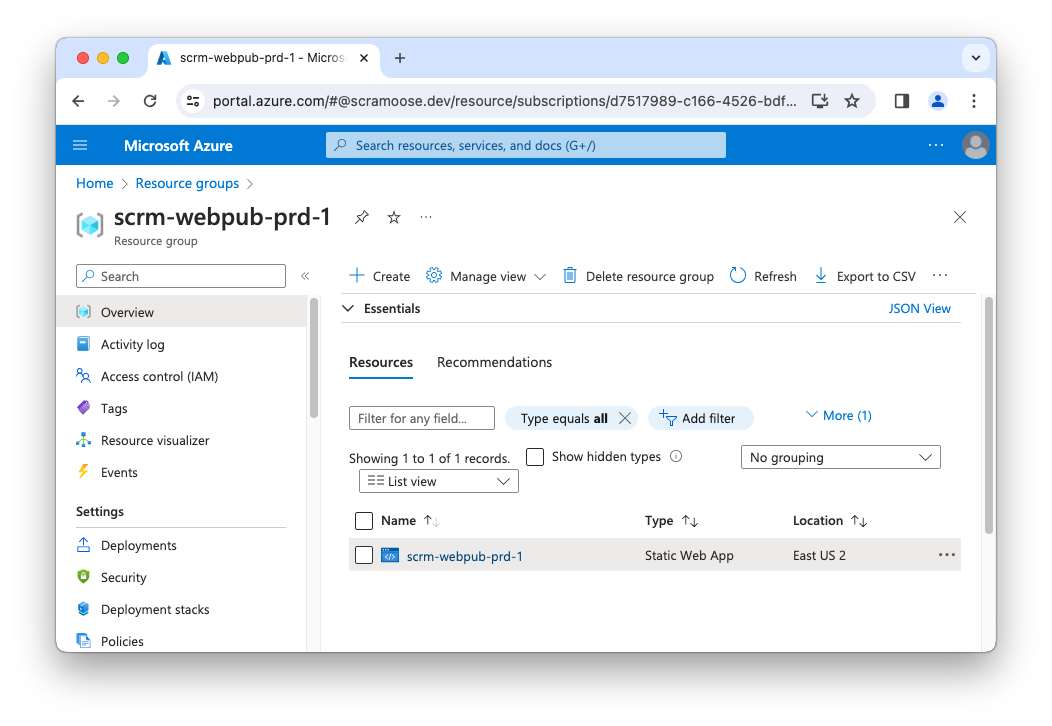
You should see your new resource group in the Azure portal within the next couple of minutes. You will also notice a new file in your Terraform working directory named terraform.tfstate. Go ahead and take a peek at it. It will have the definition of the resource group we just created.
Create Static Web App
Now we’re going to add the definition for our Static Web App and run the Terraform commands all over again. Add this to your main.tf file:
resource "azurerm_static_web_app" "public_site" {
  name = "scrm-webpub-prd-1"
  resource_group_name = azurerm_resource_group.public_site.name
  location = azurerm_resource_group.public_site.location
}
Notice that the resource_group_name and location values are not hard-coded. Instead, we tell Terraform to get those values from the resource group we already defined above. Instead of re-writing those values and potentially messing them up, we know we’ll just use the originally specified values. If we decide later to change the location or name of the resource group, we can do that just for the resource group definition and everything else will follow.
Why did I specify the same name for both the resource group and the Static Web App and not reference it like I did for the resource group name and location? Well, the names just happen to be the same for both the resource group and Static Web App, but that might not be the case all the time, so we want those to be independent.
Now your whole main.tf file should look like this:
resource "azurerm_resource_group" "public_site" {
  name = "scrm-webpub-prd-1"
  location = "East US 2"
}

resource "azurerm_static_web_app" "public_site" {
  name = "scrm-webpub-prd-1"
  resource_group_name = azurerm_resource_group.public_site.name
  location = azurerm_resource_group.public_site.location
}
Let’s run our plan again and see what happens.
terraform plan
azurerm_resource_group.public_site: Refreshing state... [id=/subscriptions/c36ff944-4355-4514-95c1-d43921b3d46c/resourceGroups/scrm-webpub-prd-1]

Terraform used the selected providers to generate the following execution plan. Resource actions are indicated with the following symbols:
  + create

Terraform will perform the following actions:

  # azurerm_static_web_app.public_site will be created
  + resource "azurerm_static_web_app" "public_site" {
      + api_key                            = (sensitive value)
      + configuration_file_changes_enabled = true
      + default_host_name                  = (known after apply)
      + id                                 = (known after apply)
      + location                           = "eastus2"
      + name                               = "scrm-webpub-prd-1"
      + preview_environments_enabled       = true
      + resource_group_name                = "scrm-webpub-prd-1"
      + sku_size                           = "Free"
      + sku_tier                           = "Free"
    }

Plan: 1 to add, 0 to change, 0 to destroy.
Looks good to me. Let’s apply the configuration and create our Static Web App!
terraform apply
azurerm_resource_group.public_site: Refreshing state... [id=/subscriptions/c36ff944-4355-4514-95c1-d43921b3d46c/resourceGroups/scrm-webpub-prd-1]

Terraform used the selected providers to generate the following execution plan. Resource actions are indicated with the following symbols:
  + create

Terraform will perform the following actions:

  # azurerm_static_web_app.public_site will be created
  + resource "azurerm_static_web_app" "public_site" {
      + api_key                            = (sensitive value)
      + configuration_file_changes_enabled = true
      + default_host_name                  = (known after apply)
      + id                                 = (known after apply)
      + location                           = "eastus2"
      + name                               = "scrm-webpub-prd-1"
      + preview_environments_enabled       = true
      + resource_group_name                = "scrm-webpub-prd-1"
      + sku_size                           = "Free"
      + sku_tier                           = "Free"
    }

Plan: 1 to add, 0 to change, 0 to destroy.

Do you want to perform these actions?
  Terraform will perform the actions described above.
  Only 'yes' will be accepted to approve.

  Enter a value: yes

azurerm_static_web_app.public_site: Creating...
azurerm_static_web_app.public_site: Creation complete after 2s [id=/subscriptions/c36ff944-4355-4514-95c1-d43921b3d46c/resourceGroups/scrm-webpub-prd-1/providers/Microsoft.Web/staticSites/scrm-webpub-prd-1]

Apply complete! Resources: 1 added, 0 changed, 0 destroyed.
Draw your attention to the penultimate line: azurerm_static_web_app.public_site: Creation complete after 2s. Completed after two seconds! That’s way less time than it would take to type and click this all in the portal. Arguably it took more time to create the Terraform code, but consider if you had to deploy this another ten times. Now that you have the Terraform code, you only have to change the resource group name and/or the Static Web App resource name.
Admire Our Work
You did it! You deployed your first Azure resource. Scramoose is well on its way to success. Sure, 90% of startups fail, but Scramoose isn’t just about making money. It’s about changing the world and all that bullshit.
Microsoft generates a random URL and puts a temporary website up there for you automatically, so let’s take a look at it. There are multiple ways to discover the URL, but here are a few options.
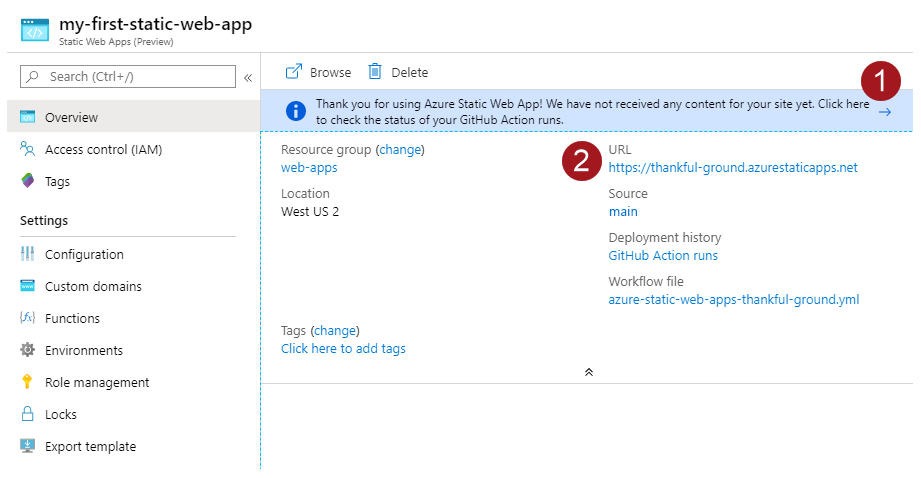
Get URL from Portal
The URL for the Static Web App will be displayed on the overview blade for the Static Web App resource we created. You can copy or just click on it to go directly to your site.
Get URL from Azure CLI
Run the following Azure CLI command to find the URL.
az staticwebapp show --name scrm-webpub-prd-1 --query "{url:defaultHostname}"
You’ll see output like this. Paste that URL into your browser and behold!
{
  "url": "delightful-rock-088a1930f.5.azurestaticapps.net"
}
Get URL from Terraform
Terraform can output values from the resources it creates, but we have to tell it to do so. In this case, we can add an output block that will spit out the URL for the Static Web App. Add the following code to your main.tf file, run terraform apply again, and you’ll see the URL.
output "static_site_hostname" {
  value = azurerm_static_web_app.public_site.default_host_name
}
azurerm_resource_group.public_site: Refreshing state... [id=/subscriptions/c36ff944-4355-4514-95c1-d43921b3d46c/resourceGroups/scrm-webpub-prd-1]
azurerm_static_web_app.public_site: Refreshing state... [id=/subscriptions/c36ff944-4355-4514-95c1-d43921b3d46c/resourceGroups/scrm-webpub-prd-1/providers/Microsoft.Web/staticSites/scrm-webpub-prd-1]

Changes to Outputs:
  + static_site_hostname = "delightful-rock-088a1930f.5.azurestaticapps.net"

You can apply this plan to save these new output values to the Terraform state, without changing any real infrastructure.

Do you want to perform these actions?
  Terraform will perform the actions described above.
  Only 'yes' will be accepted to approve.

  Enter a value: yes


Apply complete! Resources: 0 added, 0 changed, 0 destroyed.

Outputs:

static_site_hostname = "delightful-rock-088a1930f.5.azurestaticapps.net"
Note that Terraform detects that your code won’t actually change the resources. After you type yes, you’ll see that 0 resources were added, changed, or destroyed. That’s nice to know. But if you take a peek at your terraform.tfstate file, you’ll see a new entry for the output, because Terraform tracks output values in the state.
What Now?
That’s it! You haven’t really done anything worth showing your family, not that they’d understand what we do anyway. But you’ve grown as a person, and isn’t that better than any adulation you could receive from your loved ones? (Answer: no, it’s not better.)
Remember, we’ve only deployed the infrastructure (that is, the Static Web App Azure resource) which is why you’ll see a temporary site at the URL. We’re still waiting for our web designer get back to us.
Oh wouldn’t you know? It looks like our web designer just finished the website. Good timing. We’ll deploy that to this new Static Web App in the next post.
Comments