Update Static Web App
Madyson, the CEO of Scramoose and a real ideas guy (trust fund kid), had the brilliant notion of trying to solicit investors in the company, even though we don’t have a product yet. But hey, why should the lack of a product stop entrepreneurship? He’s asked that we add an email address where people can inquire about investing. So sure, let’s do that.
Make Changes Locally
First thing’s first, let’s make this change to our website locally and test it. Fire up VS Code and open the terminal into the scramoose-web-public folder.
Create New Branch
When we pushed our changes to our GitHub repos, we pushed directly to our main branch. Well, that’s not exactly the best way to go about it. A more appropriate way would be to create a branch for all your changes, and then create a pull request for that branch when the changes are ready.
I’m going to show you how to do this on the command line. When we make changes to our Terraform configuration in our next project, I’ll show you to do this in VS Code.
Run the following command in your terminal to create a new branch named solicit-investors and switch to that branch.
git checkout -b solicit-investors
Update Static Web Content
If you need a refresher on testing locally, see the Static Web App Local Development post.
Run the following command to start up the Static Web App emulator on your local computer.
./node_modules/.bin/swa start
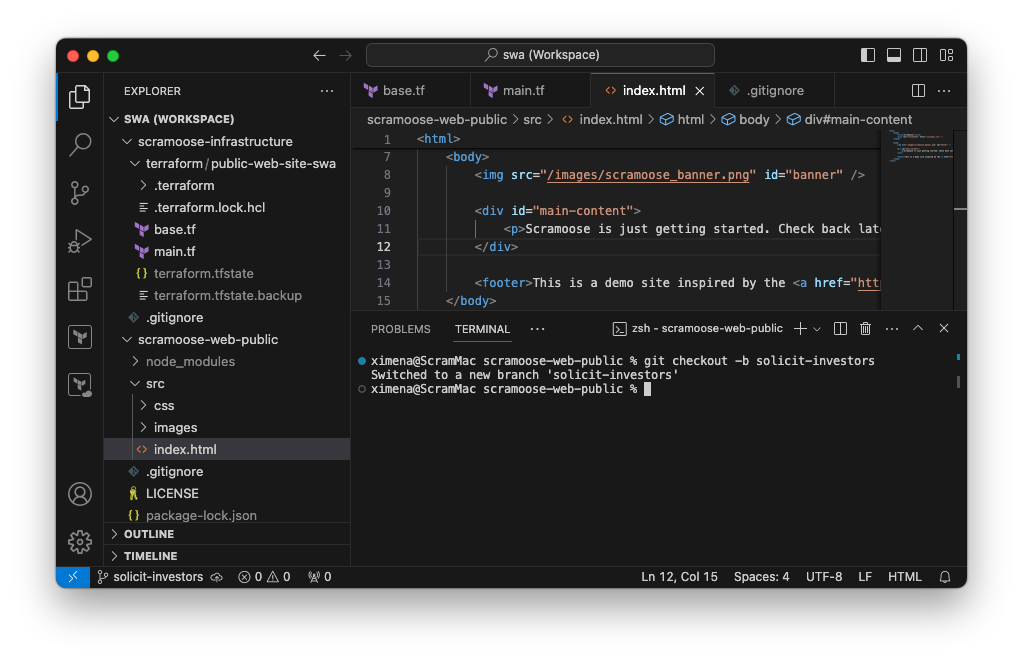
Now open the src/index.html file in VS Code and add the following on line 12.
<p>Interested in investing? Email us at bad-decisions@scramoose.dev.</p>
The whole index.html file would look like this:
1
2
3
4
5
6
7
8
9
10
11
12
13
14
15
16
17

<html>
    <head>
        <title>Scramoose</title>
        <link rel="stylesheet" href="/css/main.css" />
    </head>

    <body>
        <img src="/images/scramoose_banner.png" id="banner" />

        <div id="main-content">
            <p>Scramoose is just getting started. Check back later when this becomes the best site on the internet!</p>
            <p>Interested in investing? Email us at bad-decisions@.</p>
        </div>

        <footer>This is a demo site inspired by the <a href="https://www.secondsleep.io">Second Sleep</a> project.</footer>
    </body>
</html>
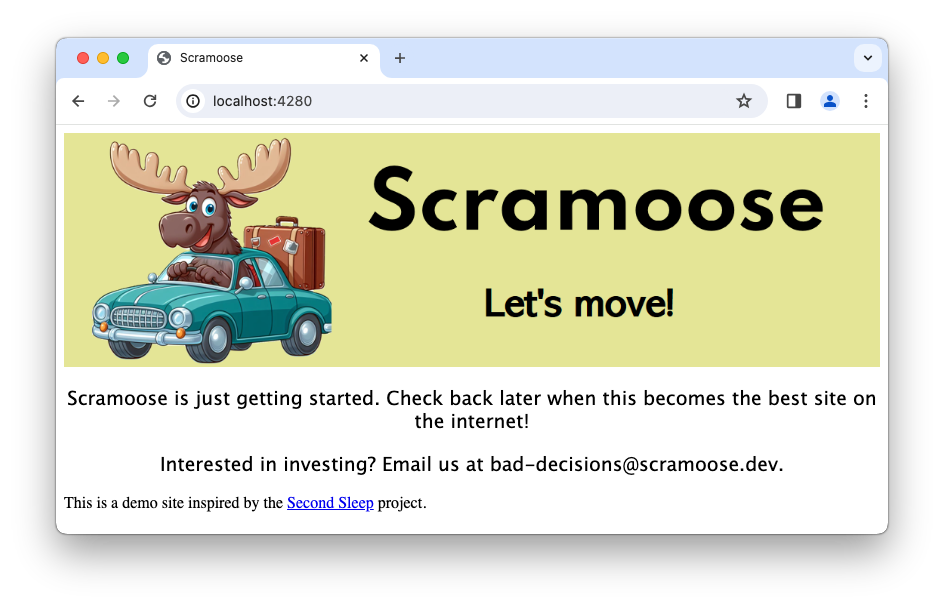
Now refresh your web browser (or go to http://localhost:4280 if you closed it), and you’ll see your changes.
Create Pull Request
Once things are looking good locally, it’s time to create a pull request.
Commit & Push Changes
First, let’s add and commit our changes. When I showed you this last time, we did it in two steps, but let’s do it all at once using the commit -a command.
git commit -a -m "Add investor solicitation"
Very good. Now push the changes up to GitHub.
git push
Hmmm… you probably got an error message like this.
fatal: The current branch solicit-investors has no upstream branch.
To push the current branch and set the remote as upstream, use

    git push --set-upstream origin solicit-investors
Git is telling you that it doesn’t know what you want to call the branch when you push it up to GitHub. You’d think it would just call it solicit-investors, but Git doesn’t like to make assumptions. Run the command it’s recommending.
git push --set-upstream origin solicit-investors
If it worked, you’ll see output like this:
...
remote: Create a pull request for 'solicit-investors' on GitHub by visiting:
remote:      https://github.com/scramoose-ximena/scramoose-web-public/pull/new/solicit-investors
remote:
To https://github.com/scramoose-ximena/scramoose-web-public.git
 * [new branch]      solicit-investors -> solicit-investors
Branch 'solicit-investors' set up to track remote branch 'solicit-investors' from 'origin'.
By the way, now that you set the upstream remote branch, you only have to run git push for any further changes you want to push on this branch.
Create Pull Request in GitHub
Now on to the actual pull request (PR).
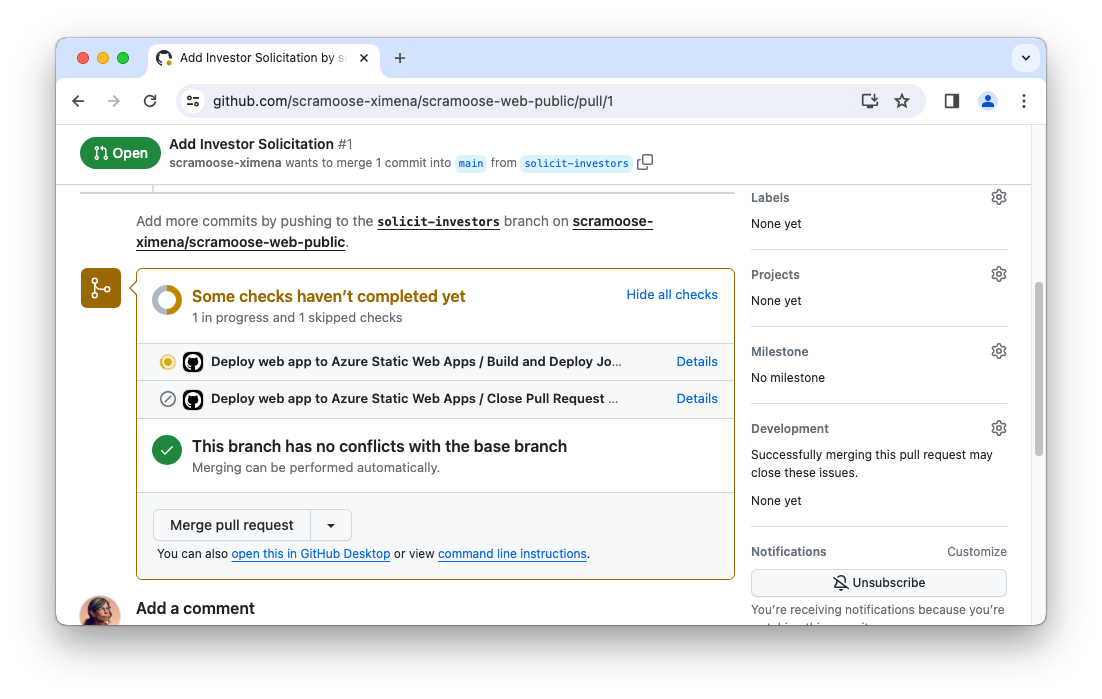
- Go to your scramoose-web-public repo in GitHub. You should see a banner in your repo that looks kind of like the image below.
 If you see that banner, click on the button. If not, follow GitHub’s instructions for creating a pull request.
 - Type a title and description in the next page. The description supports Markdown. If you don’t want to think about, you can use this:
-
Title:
Add Investor Solicitation -
Description:
Our stupid CEO wanted us to add this stupid text because he's stupid. Luckily he'll never read this because he's stupid.
-
Title:
- Click the Create pull request button.
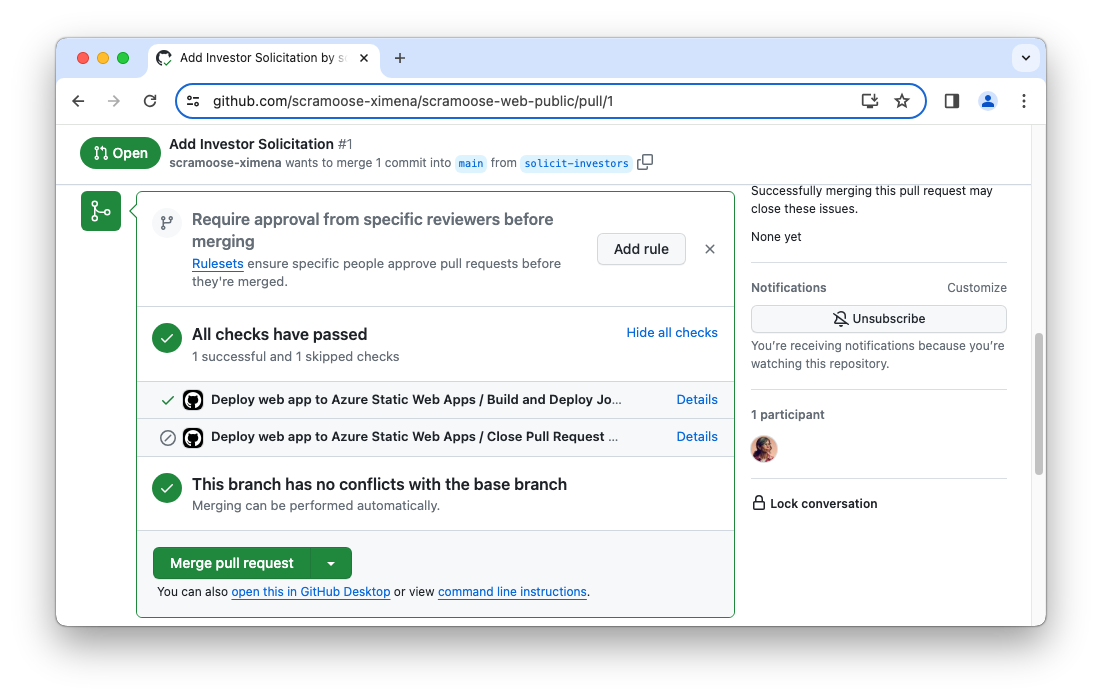
This will take you to the PR page where you’ll see the description at the top and some checks that should be running. Don’t click the Merge button yet! You’ve just done something cool and I want you to appreciate it.
One of the checks that ran was our GitHub Actions workflow. At the top of our workflow YAML we have these lines:
on:
  push:
    branches: [ "main" ]
  pull_request:
    types: [opened, synchronize, reopened, closed]
    branches: [ "main" ]
The push: part says to run the workflow when we merge with the main branch, which we already did once back when we initially deployed our app and which we’ll do when we complete the PR later in this post. But the pull_request: part says to run the workflow when we create a PR, which is what we just did.
Note that the branches: [ "main" ] line means that this won’t happen for just any PR but only PRs that will be merged into the main branch. As you start progressing more, you may create a branch from another branch and this workflow won’t run for a branch that is merged into a non-main branch.
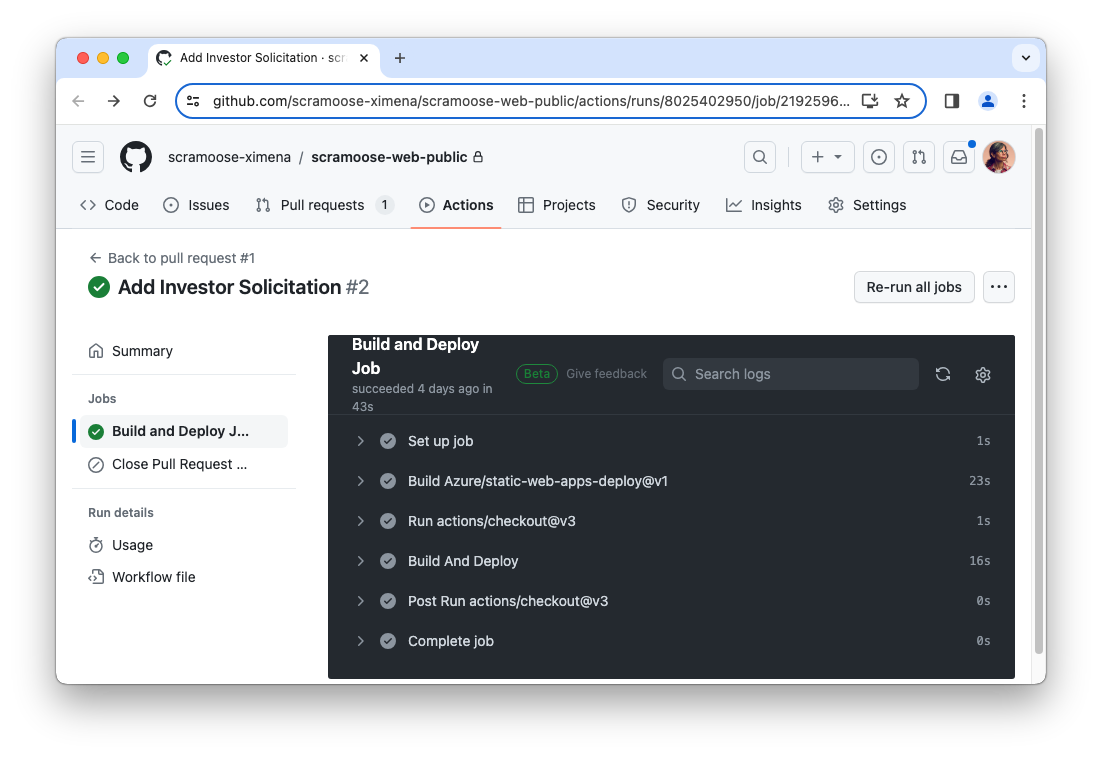
The workflow that kicked off when we created the PR will create a new preview environment in our Static Web App and deploy the code in the PR to the preview environment.
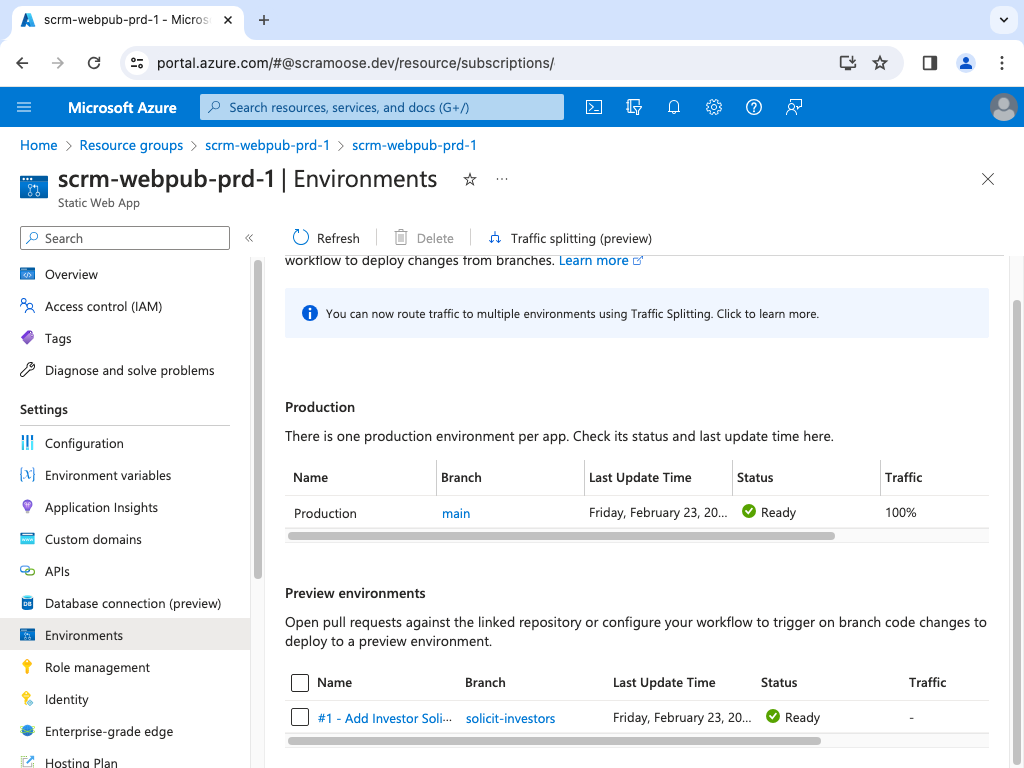
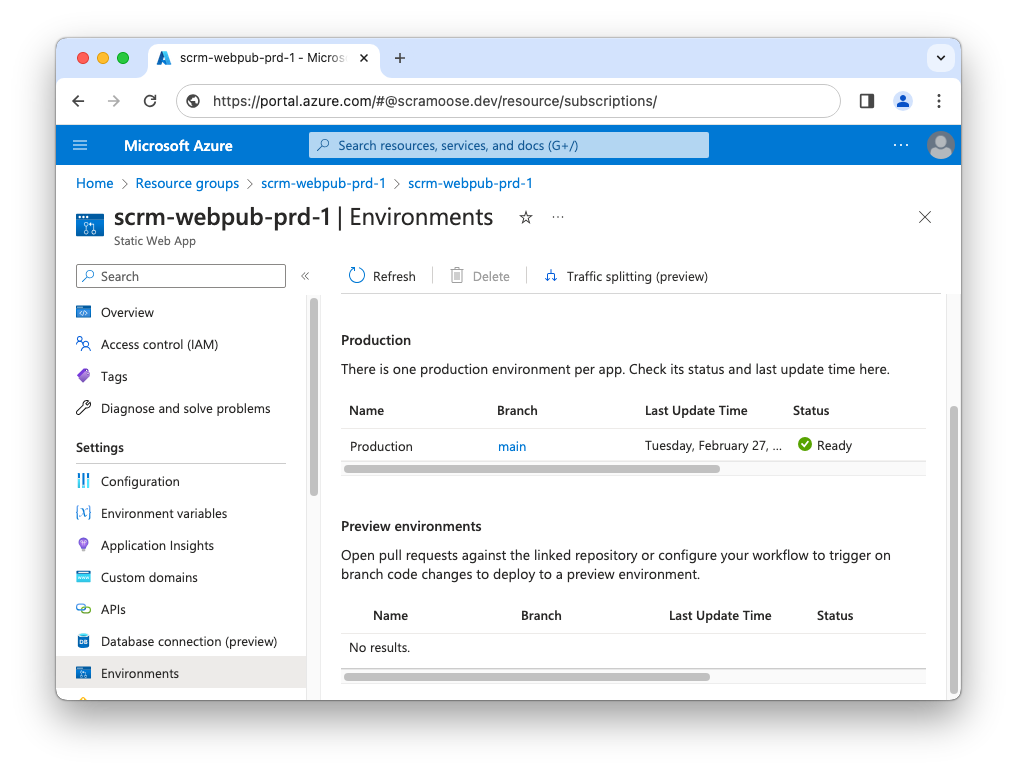
- Go to the scrm-webpub-prd-1 resource in the Azure portal.
- Click on the Environments blade.
- You’ll see your PR listed under the Preview environments section. Click on the Browse button to open our changes in a browser. You can send this link to your stakeholders to make sure they approve of the changes that are about to be made.
You’ll also see this link on the PR page in GitHub if you wait long enough to let the workflow finish whereupon the github-actions bot will leave a comment with a link to the preview URL. 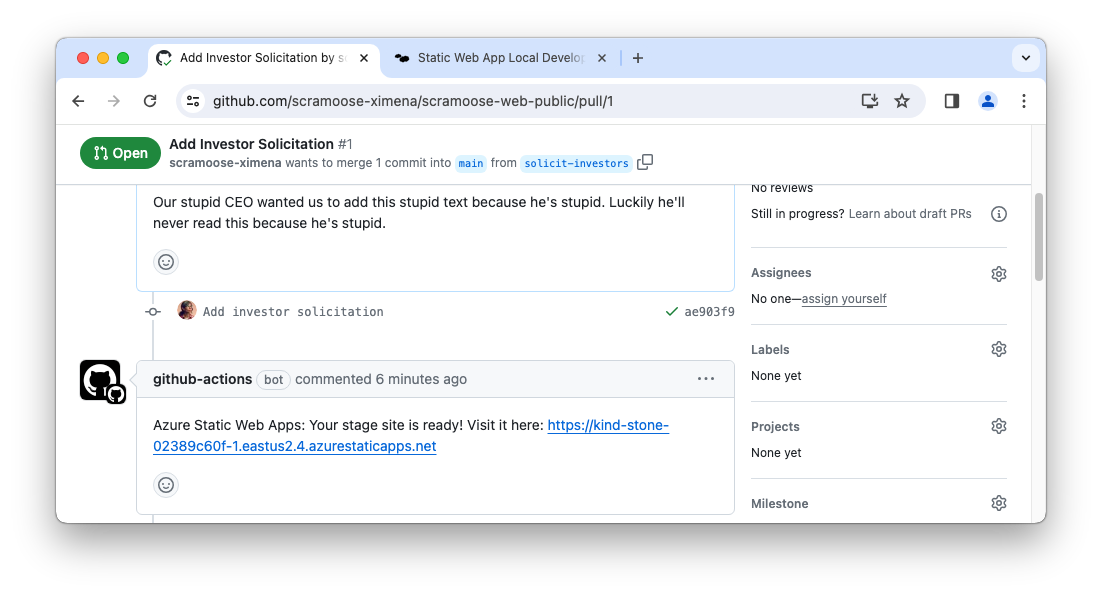
Complete Pull Request
In our scenario, Ximena sent the link to Madyson and he sent an email back while he was paragliding with the body of “![]() ”, so Ximena moved on to the next step.
”, so Ximena moved on to the next step.
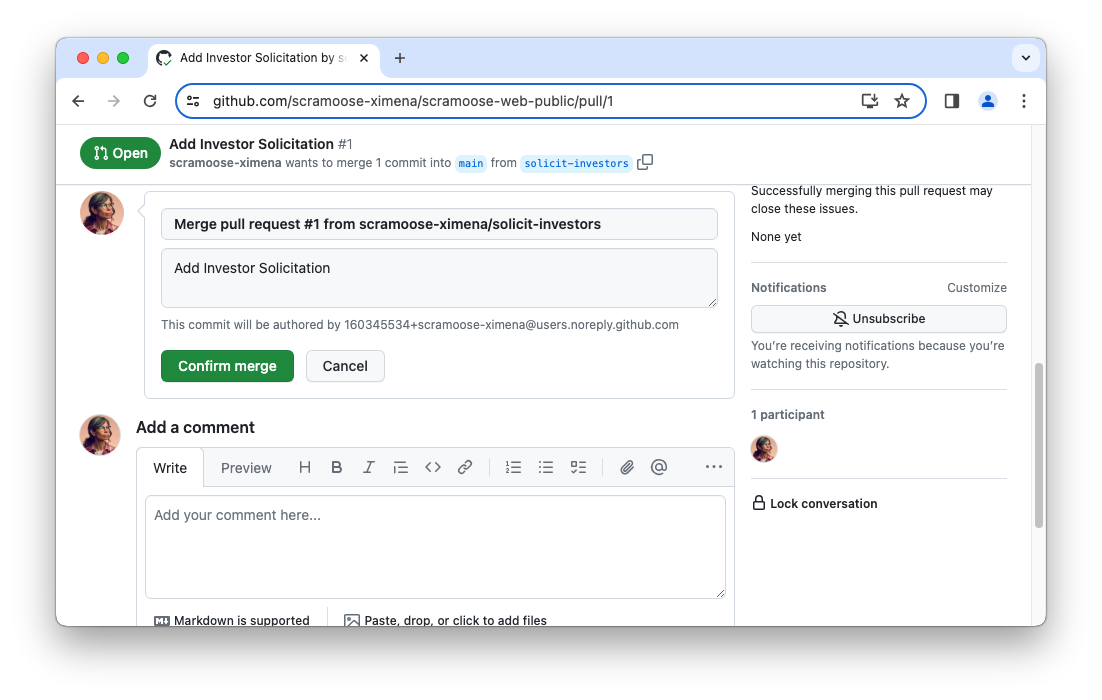
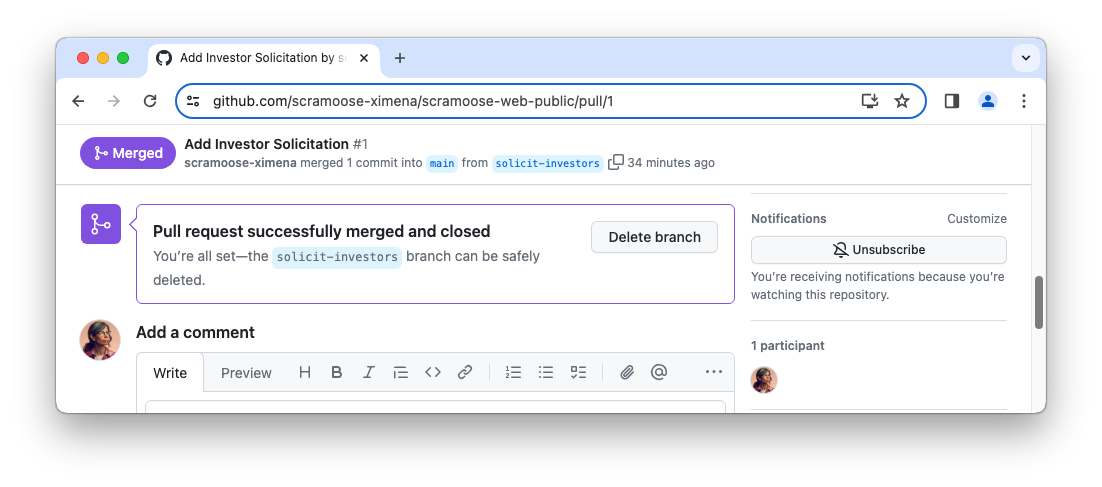
Back at the PR in GitHub, click on the Merge pull request button followed by the Confirm merge button.
If you’re quick enough to navigate over to the Actions tab in your scramoose-web-public repo you’ll see two workflows in progress.
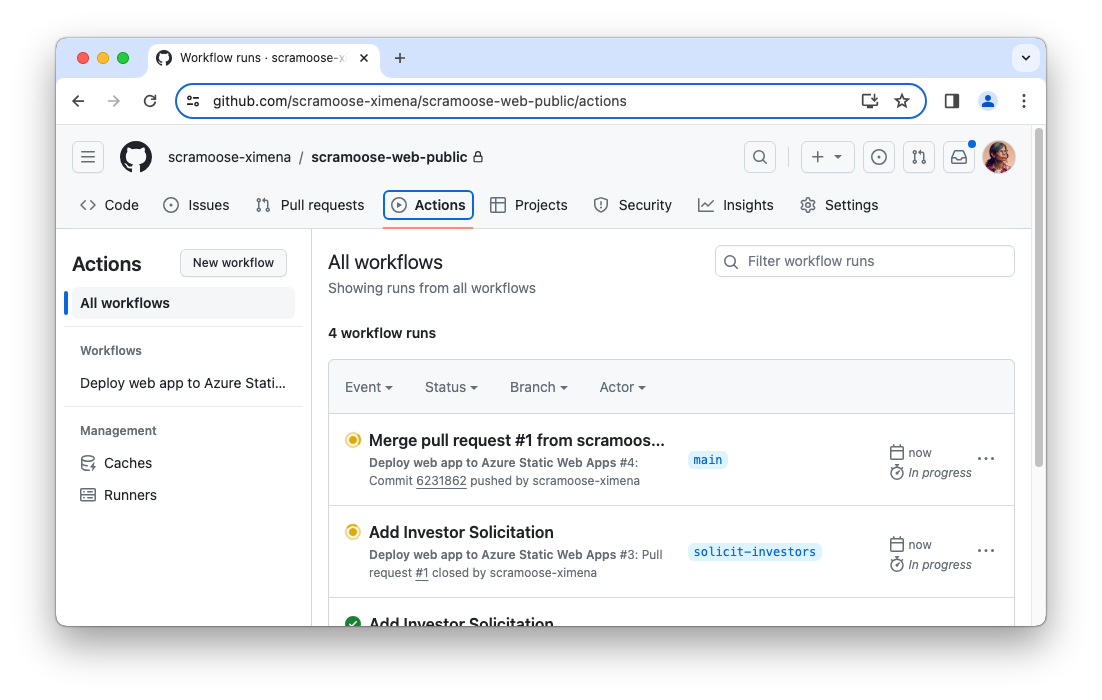
The first workflow will have a name that begins with Merge pull request and is a new run of the workflow to deploy the website content from our main branch to the Static Web App. The main branch was updated with our new changes when we clicked that merge button for the PR. When that workflow finishes, the main URL of the Static Web App will have that text about investors.
The second workflow will have the same name as your PR (Add Investory Solicitation if you used my example) and is a new workflow that kicked off when you closed the PR by clicking the merge button. There is a second job in the workflow defined by close_pull_request_job: that is skipped when changes are made to the main branch by either merging or creating a PR. But that job is run when the PR is completed. The job deletes that preview environment from our Static Web App. If you view the Environments blade of the scrm-webpub-prd-1 resource in the Azure portal, you’ll see that the environment has been deleted.
Delete Your Branches
This step is optional but is a good practice to keep things tidy. Now that your work is complete and everything has been merged into main, you can delete the solicit-investors branch from both your local computer and GitHub.
You may think that you want to keep that branch around in case you need to go back to it. Well, Git is designed so that every commit is saved by default. Each commit is assigned an ID and behind the scenes, that branch you created is simply a friendly name for the last commit ID made on that branch. But the commit IDs are there forever (with exceptions). The point is, all the commit history from the solicit-investors branch will be added to the main branch after you merge. However, if you delete a branch that has not been merged into another branch, that work is totally gone!
Delete Branch in GitHub
There are two ways to do this and both are easy. The easiest is to go to the page for your PR, find the entry where it said the PR was merged and closed and click the Delete branch button. The other way is from the page that shows all branches as described here.
Delete Local Branch
To delete the branch locally, you must first change to another branch. This is also a good chance to update your main local branch from GitHub since it will have the most recent changes that you just merged.
Before we do that, let’s do a fetch. This step is optional, but it will let you see what’s changed up in GitHub without merging everything into your local repository.
git fetch
The output will show that there have been changes to the main branch in GitHub.
remote: Enumerating objects: 9, done.
remote: Counting objects: 100% (9/9), done.
remote: Compressing objects: 100% (6/6), done.
remote: Total 7 (delta 2), reused 0 (delta 0), pack-reused 0
Unpacking objects: 100% (7/7), 2.55 KiB | 261.00 KiB/s, done.
From https://github.com/scramoose-ximena/scramoose-web-public
   12b86fa..6231862  main       -> origin/main
Now we’ll merge the changes into our local main. Change your branch to main.
git checkout main
After a few seconds, VS Code will show that you’re in the main branch in the lower-left corner. Pull down the most recent changes from GitHub.
git pull
If you still have the local SWA CLI running, you can refresh your local browser to confirm that main still works and that it shows your recent changes.
Now delete your local solicit-investors branch with the branch -D command.
git branch -D solicit-investors
Git will tell you the branch was deleted:
Deleted branch solicit-investors (was ae903f9).So fresh and so clean!
If you want to see other branches you have locally, simply type git branch to list them all out.
Achievement Unlocked!
Congratulations! You’ve completed the first service in our series. You’ve been awarded the prestigious Second Sleep certificate of completion. You can proudly display this in your home office to impress your children or pets.
Remember, there’s no right or wrong way to do this. If you found a solution to your problem, then you did it the right way! Having said that, my way is undoubtedly the most correct way and anything else is very wrong, so check the links below to see what my code looks like when this service is complete.
Comments